
Learn Facebook Ad Setup- Step-By-Step Guide

Have you noticed any posts written ‘sponsored’ on Facebook?’ Have you wondered why some posts have this title and some don’t?
Well, in this era of digital marketing, Facebook ads are a must to reach your potential target customer. A lot of people think it is difficult to set up a Facebook ad but let me tell you, it is not Einstein’s law.
In this blog, I’ll guide you step by step to learn how to set up Facebook ads and get the best return.
What are Facebook ads?
Facebook Ads is an online advertising platform offered by Meta. It allows the advertiser to place advertisements across Facebook’s ecosystem like Instagram, WhatsApp, Messenger, etc.
Here, instead of keywords, the advertisers bid for space on the platform. You can customize your ads and target your audience more precisely.
Step-by-step to run Facebook Ads:
1. Create an Account on Facebook Ads Manager
The first step is to create a Facebook ad manager account. Create an account on Meta Ads Manager by providing your information.
When you sign up for Facebook, you’re given a personal ad account ID by default. You can see this ID by going to Ads Manager and looking in the upper left-hand corner.
To use Facebook Ads Manager, you need a verified payment method and:
- A Facebook Page or
- To be an admin, editor, or advertiser on someone else’s Page
If you do not have a page for your business, you can follow Facebook’s steps to set one up. Any page you create will be automatically given an ad account.
The easiest way to find Facebook Ads Manager is to click on and bookmark this direct link. You will be brought directly into the Facebook Ads Manager for your ad account. If you manage multiple ad accounts, use the account drop-down menu to pick the right account.
To navigate to Ads Manager right from your business page, head to the left sidebar and click on the Ad Center drop-down arrow of any Facebook page, then choose All Ads from the drop-down. At the bottom of that page is an option to click Ads Manager.
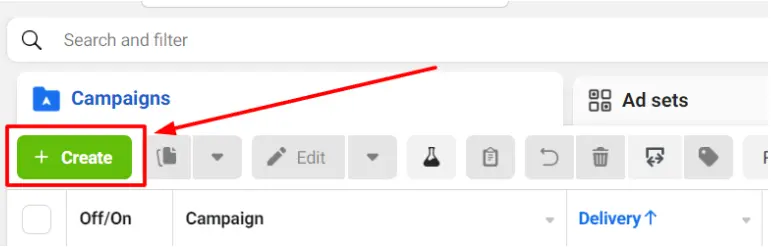
2. Create
Click the green icon ‘Create ad’ to get started with your first ad.
3. Choose Buying Type
Meta ads offer two different type buying types
Auction
This offers more choice and efficiency with less predictable results.
Reservation
This allows to plan and buy campaigns in advance with predictable performance goals and offers more control.
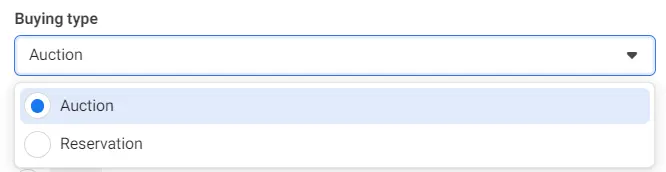
Now the question is which one should you use? The answer depends on your campaign objective. While auction offers you various campaign objectives, reservation only offers two: Awareness and Engagement.
4. Select Campaign Objective.
With the goal of your business, you can set up 6 types of ads.
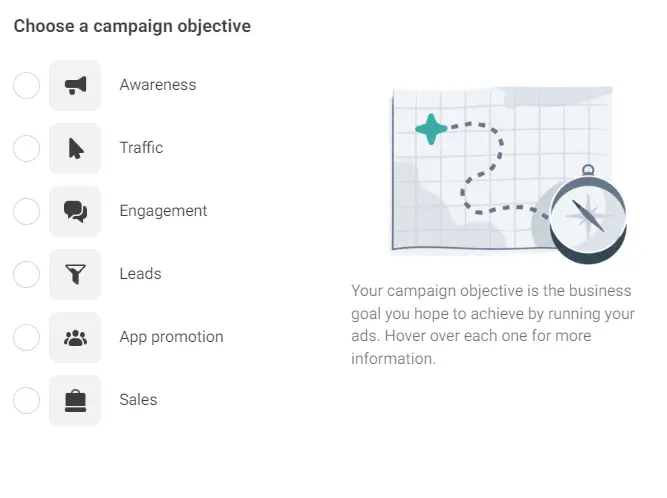
Awareness
This ad helps to create brand visibility for the business. This goal is good for reach, video views, or giving information.
Traffic
This ad type will help to get more traffic to a website or event. It is best for clicks, landing page visits, and calls.
Engagement
This ad type will make you more likely to receive messages, in-app purchases, likes, and comments. It’s also great for video views, conversions, and calls.
Leads
For generating leads, this ad type works the best.
App Promotion
Get more users for your app or encourage current users to keep using it.
Sales
For increasing sales of a certain product, your objective should be sales.
5. Pick a Name for Your Ad Campaign
After selecting a marketing objective, you should name your ad. Be sure to make your campaign name recognizable to everyone working on the ads. You may name the ad based on the objective, messenger, etc.
For example:
Unilever_Engagement ad
By seeing this, you can understand the objective of the ad later on.
6. Select Ad Category
After the name, select an ad category based on categories like credit, employment, housing, social issues, elections, or politics. If your ad falls into this category, it is better to choose the category so that it remains compliant with Facebook’s advertising standards.
7. Choose if You Want to Do A/B Testing
Here you’ll be able to turn on the A/B test feature, where you can try out different images, text, audiences, or placements to maximize your ad performance.
8. Choose Whether You Want Advance Campaign Budget
If you choose the auction buying option, then Facebook will automatically find the best available opportunities for results across your ad sets.
9. Narrow down your performance goal
Facebook now allows you to get super specific about the ultimate goals of your ad. Each campaign goal mentioned in step 3 has a separate set of specific targets — for example, Awareness has everything from the broader ‘Maximize reach’ to the hyper-specific ‘Maximize two-second continuous video views.’
10. Set Your Budget and Schedule
The next segment is setting up the budget. When you set an ad budget, it’s important to remember that this figure represents the maximum amount of money you want to spend. You can set your budget per day or as a total amount for the campaign
Daily: It limits on what you spend each day on your ads
Lifetime: A lifetime budget is the maximum that you will spend entire time you run the ad campaign.
11. Customize the Target Audience
This segment is very crucial. Here, you have to define what type of customer you want to target. You can choose 3 options:
- Location
- Age
- Language
Previously, Meta had a lot of options like interests, behavior, etc. Removing all these segments, Meta introduced Meta Advantage+ Audience. This feature does all the ad targeting for you.
You can rely on Meta’s AI to find your audience or add specific information about the people you want to reach as an audience suggestion.
You can also create lookalike audiences or custom audiences.
Lookalikes
By adding this targeting to your campaign, you can reach new users who exhibit similar online behavior to your existing users.
12. Choose Ad Placements
The next step is to choose ad placements. You can choose Meta’s advanced ad placement or manual placement.
Placement Locations of Facebook Ads
- News feed
- Marketplace
- Suggested video
- Right column
- Stories
- Instant Articles
- In-stream videos
13. Choose Facebook Page
Now it is time to design your ad content. The first step is to select the Facebook page where you want to show the ad.
14. Choose an ad format.
Under ad setup, you’ll be able to
- Create a new ad
- Use existing posts to create ad
- Use mock-ups from Meta’s Creative Hub.
You can also select different ad formats like-
Image Ads
Media buyers use a single image with a call to action in this type of ad. This type of ad performs well for showcasing products and grabbing customer attention.
Video Ads
Video ads perform better than image ads in most cases. You can create a story of your business and show your products. This format is highly effective
Carousel ads
A carousel ad is perfect if you want to show multiple products or contents in a single ad. You can showcase the collection of products that you have.
Collection ads
This type of ad works best for E-commerce platforms. It allows the customer to explore and purchase directly.
15. Select Media and Write a Facebook Ad Copy
It’s finally time to add those scroll-stopping creative assets! Upload photos or clips. And write effective ad copy. You can check out this blog to learn the copywriting tips for writing effective Facebook Ad Copy
16. Choose Destination
Now choose the destination where you want to send the audience if they click on the ad.
There is an Instant Experience option, which gives the audience a fast-loading, mobile-optimized experience.
17. Publish Your Ad
To submit the ad for review, click on the button ‘Publish’. Facebook will review your ad and publish it within a few hours if it complies with the Facebook Ads Standard Policy.
Learn about the Facebook ads policy in this blog: Facebook Ads Policy [2024]- Explained Easily
18. Monitor and Track
After your ad is published, you have to monitor and track the performance often. It is important to optimize the ad based on the performance.
Now you know the steps to set up Facebook ads. Then, what are you waiting for? Go and run Facebook ads on your page. Because the more you practice, the better you will learn the insights. Don’t forget to check my other blogs related to Facebook Ads.